
In this article, I would like to introduce how to blink LED with I/O pins.
0. Overview of how to blink a LED with I/O pins
1. Prepare for setting up
2. A basic understanding of TK/TKD
3. Make a simple electrical circuit for blinking a LED
4. Create a program for the Arduino Robot
5. Upload & run
Finally, a LED works as follows.

1. Prepare for setting up
Please prepare for a number of hardware below.
・Arduino Robot
・Peripheral accessories of the Arduino Robot
- LCD screen for displaying images, texts, and control interfaces.
- Micro SD card(2GB)
- USB cable for connecting the Arduino Robot with computers.
- 4 rechargeable AA batteries.
・Breadboard
・Jump wire
・LED
・resistor(100〜300Ω)

Please refer to the previous article to set up the Arduino Robot and the peripheral accessories.
2. A basic understanding of TK/TKD
TK/TKD are digital/analog I/O pins of the Arduino Robot.
These pins are arranged as follows.

Photo by Arduino Robot official website
・TK0 to TK7 pins
TK pins are used as analog input for sensors, like distance sensors, analog ultrasound sensors.
・TKD0 to TKD5 pins
TKD pins are used as digital I/O. A HIGH or a LOW voltage value can read/write through pins. Pins TKD0 to TKD3 can also be used as analog inputs.
I use TKD3 as an output pin this time.
TKD3/4/5 pins are arranged 5V, Digital I/O, Ground as follows.

The Arduino Robot official website doesn't write about these pin arrangements.
But I verified.
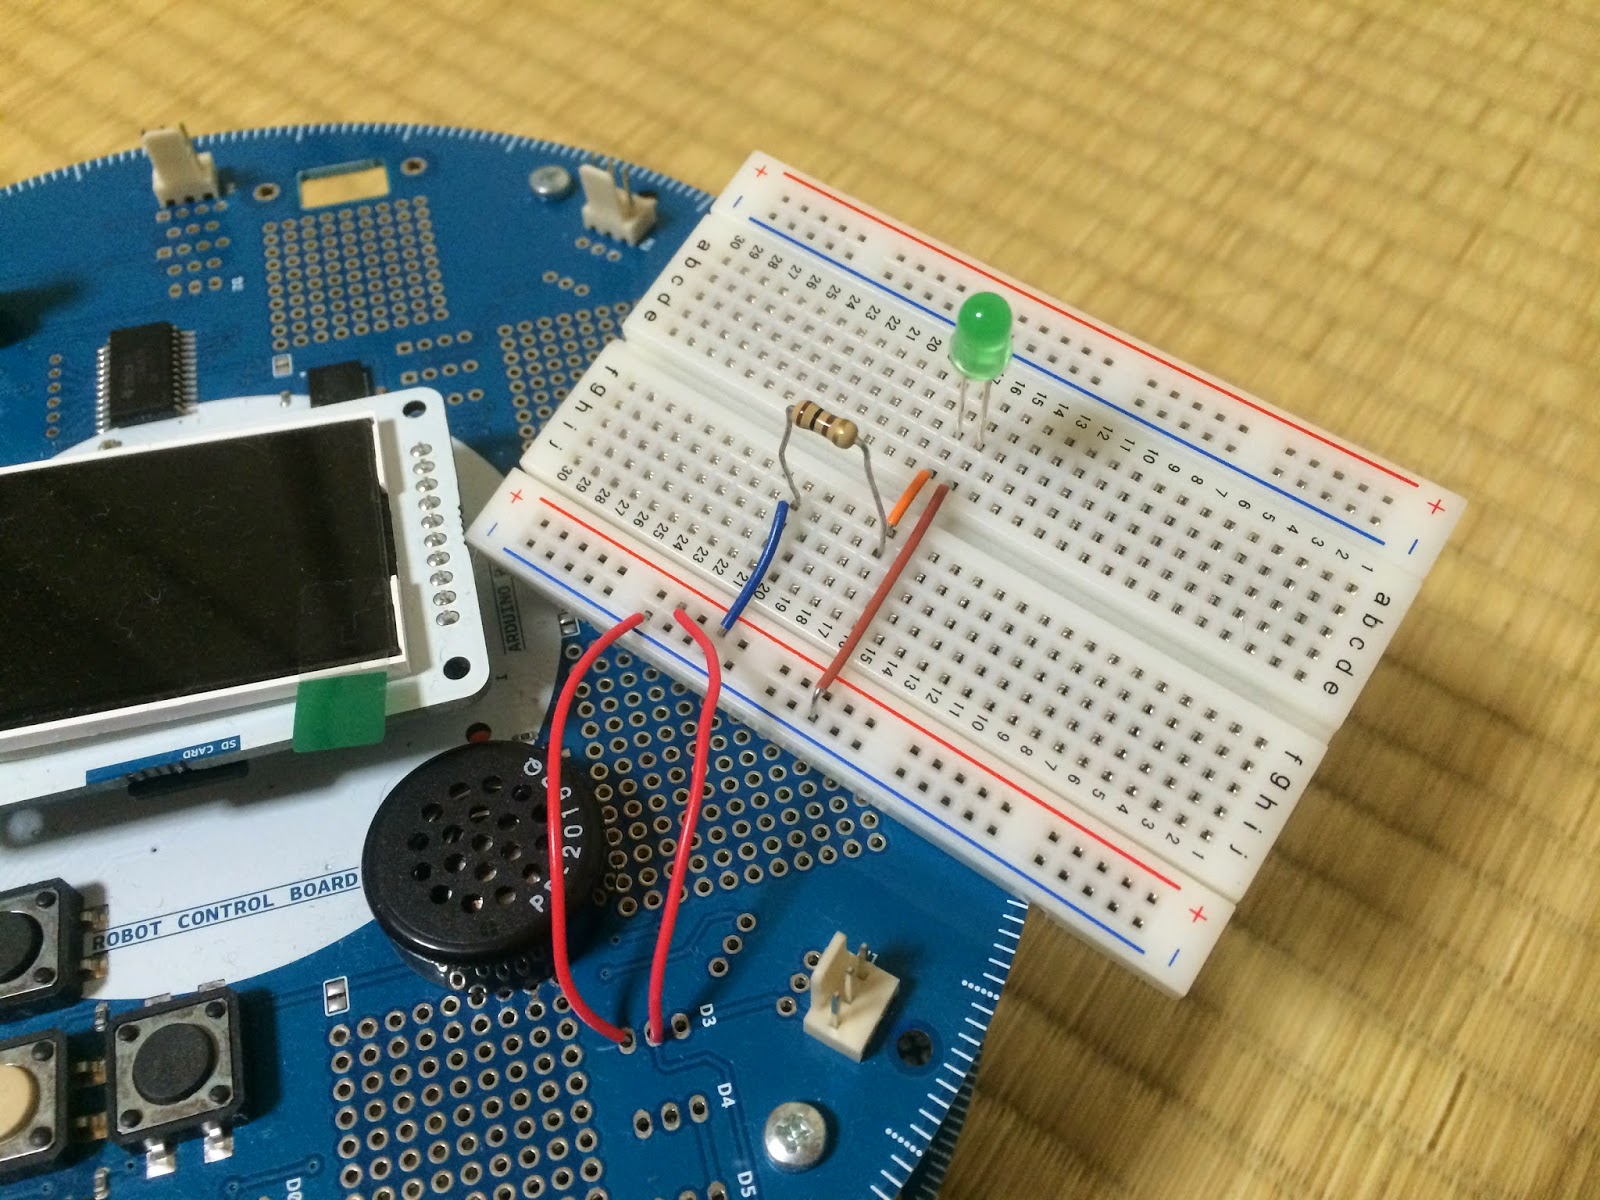
3. Make a simple electrical circuit for blinking a LED
Please make a simple electrical circuit as follows.
4. Create a program for the Arduino Robot
Please run the Arduino IDE, and create a program as follows.
#include <ArduinoRobot.h>
#define sensor TKD3
void setup() {
Robot.begin();
pinMode(sensor, OUTPUT); // set TKD3 as output
digitalWrite(sensor, HIGH); // set TDK3 as high
}
void loop() {
Robot.digitalWrite(sensor, HIGH); // set TDK3 as high
delay(1000);
Robot.digitalWrite(sensor, LOW); // set TDK3 as low
delay(1000);
}
5. Upload & run
Please connect the arduino robot to a computer with a USB cable, and then click the "Upload" button or Ctrl + U key to upload.
If the upload is successful, the message "Done uploading." will appear in the status bar of the IDE. And then a LED is blinking.
In this article, I explained how to blink a LED with I/O pins. I would like to explain how to apply a voltage to the Arduino Robot from the Raspberry Pi.
Hello.
ReplyDeleteIm trying to do things with this robot, but the wires are loose in the holes....how did you solve that?
Thank you